Hello everybody, hope you are having an incredible day today. Today, we’re going to prepare a distinctive dish, for beginners: yogurt bread starter (leaven). One of my favorites food recipes. For mine, I will make it a bit unique. This is gonna smell and look delicious.
Sterilize the jar in boiling water. (Or moisten the jar and microwave for a minute.) Leave the jar to cool down. Water droplets on it are fine. You can use tap water for the starter.
For Beginners: Yogurt Bread Starter (Leaven) is one of the most well liked of recent trending meals on earth. It is appreciated by millions every day. It is easy, it’s quick, it tastes yummy. For Beginners: Yogurt Bread Starter (Leaven) is something which I have loved my whole life. They’re fine and they look wonderful.
To get started with this particular recipe, we must prepare a few components. You can have for beginners: yogurt bread starter (leaven) using 4 ingredients and 15 steps. Here is how you can achieve it.
The ingredients needed to make For Beginners: Yogurt Bread Starter (Leaven):
- Get 80 grams Yogurt
- Get 20 grams Bread (strong) flour
- Prepare 3 grams Sugar
- Get 20 grams Bread flour to add later
Great recipe for For Beginners: Yogurt Bread Starter (Leaven). Since this bread starter is made by adding flour to yogurt, it's easy to see how it's fermenting, unlike some other starters. If you leave a little leftover, use half. The methods to leavening bread and baked goods can be divided into three categories: physical, biological Because yeast produces carbon dioxide at a slow rate, it is often used in breads that have a strong Buttermilk, vinegar, yogurt, or even cocoa powder can be used as the acid in this reaction.
Instructions to make For Beginners: Yogurt Bread Starter (Leaven):
- Sterilize the jar in boiling water. (Or moisten the jar and microwave for a minute.) Leave the jar to cool down. Water droplets on it are fine. You can use tap water for the starter.
- Put the yogurt, bread flour and sugar in the jar and mix. See Hints for where to place the jar.
- In midsummer when it's very hot, put it in a cool location in your room when you're at home, and put it in the refrigerator when you go out and your house will get very hot. In the winter, look for a place in your house where the temperature is around 20 to 25 °C. In our house in northern Hokkaido, we have the stove on all day, so near the stove is the best location for the starter. (See Hints.)
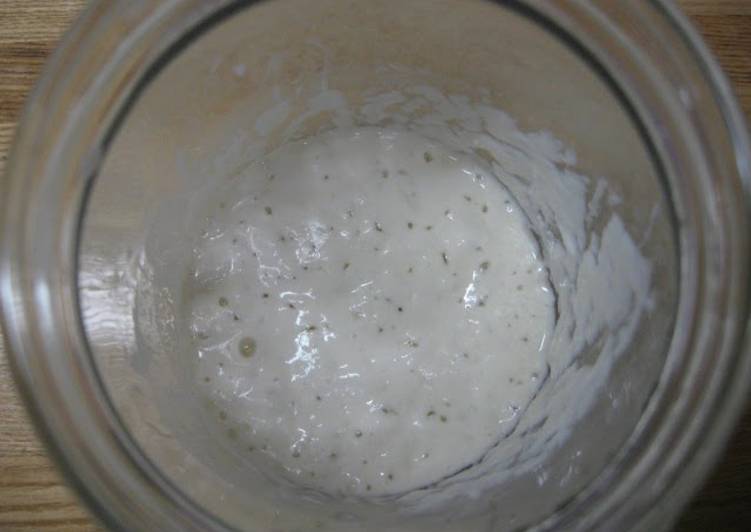
- Open the jar 2 to 3 times a day to incorporate air, and shake the jar lightly too. You can also mix it with a clean spoon. In 2 to 5 days you can see that it's fermenting and bubbling as shown in the photo. (You can make bread with this, using a ratio of 1 part starter to 2 to 4 parts bread flour.) If you aren't going to use it to bake bread right away, store it in the refrigerator.
- To add to the starter: Mix in 20 g of bread flour. Mark the top of the starter with a rubber band around the jar, so you can easily tell if it's increasing in volume. If the starter is not fermenting, mix it up about every 5 hours.
- After 5 hours, it should have doubled or tripled in volume. In this photos it's tripled in volume 10 hours later. (It usually does that in 5-6 hours.) If you let the starter rest in the refrigerator overnight after it's fermented, the dough you make with it will rise more. Bring the starter to room temperature before using it to make bread.
- If the starter doesn't increase in volume as shown in step 5 - give it an energy boost. Mix it up occasionally, and incorporate air into it. If it still isn't moving, feed it with a little sugar or honey (about 1/3 teaspoon). Mix it in, and then mix the starter occasionally while observing it.
- If the starter does ferment as shown in step 6 and then deflates again, that's fine - it means the yeast in it is very active, and the bubbles just burst. Try adding a little flour. If the starter is active, it will rise up again.
- To store the starter in the refrigerator as in steps 4 and 6, mix a bit less than 1/4 teaspoon of sugar in every 3 days. You can keep it in the refrigerator for about a week.
- What's an active starter? In step 6, it will have lots of bubbles and even have a net-like texture. If it has no air bubbles and looks slimy, it's not very active. Try mixing in a little sugar or flour. If it still doesn't get bubbly, use it to make foccacia, pizza crust,or crackers.
- Please refer to "For beginners: Basic bread Made with Yogurt Starter" -. It's an easy bread to bake with this starter.
- If making a liquid starter: Mix the yogurt, water and sugar in a 10:10:1 ratio. Leave for 3 to 4 days, and when it's bubbly it's done. Add an equal amount of bread flour to it, and when it's doubled or tripled in volume the starter sponge is done! If you keep feeding a liquid starter with sugar every 3 days, it will last for quite a long time.
- To keep a yogurt starter sponge going: Mix the sponge with about 1/4 of its weight in water and 1/4 of its weight in bread flour and mix. If it's not very active, feed it with a little sugar. You can keep the sponge going like this at least 2-3 times. You can add liquid starter instead of water.
- To make bread with starter that's not too sour: In the summer: if you keep the starter in a hot location, it will ferment fast and become sour, so if the ambient temperature is above 30 °C, after it has doubled or tripled in volume, put the starter in the refrigerator.
- In the winter: If you let the starter ferment for a long time at a cool temperature, it also gets sour easily. Add more sugar, and try to keep it in a warm location. Put it on top of the refrigerator, in the boiler room, or go to bed with it in your arms.
A starter is a piece of dough which contains wild yeast and bacteria which you use to make your This is why bread recipes for sourdough bread tend to take much longer and consist of more steps. Should I not refrigerate the starter at all? Should I start over and not use the yogurt maker to keep it. Sourdough is a delightful twist on your traditional bread, but creating and maintaining a sourdough starter can be a headache for many home bakers. Heck, I'm a culinary school graduate who spent plenty of time studying how to perfect sourdough starters.
So that is going to wrap it up for this exceptional food for beginners: yogurt bread starter (leaven) recipe. Thanks so much for your time. I’m sure that you will make this at home. There’s gonna be interesting food at home recipes coming up. Remember to save this page in your browser, and share it to your family, friends and colleague. Thanks again for reading. Go on get cooking!